Wild bird photography isn’t just about getting a sharp image of a fluttery subject—it’s a dance between patience, light, and pure luck. Anyone drawn to birds knows the thrill of catching that perfect moment, when a sparrow lands or a kingfisher dives. This wild bird guide dives into approachable, field-tested tips to give every birder, from absolute beginner to seasoned snapper, a real edge behind the lens. There’s room for mistakes and surprises, which is exactly what makes this pursuit so rewarding.
Know Your Feathered Subjects
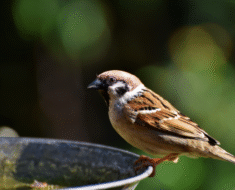
Before grabbing the camera or racing outside, pause to watch the birds. They follow their own routines, and recognizing those little rhythms makes a world of difference. Local robins might return to the same post every morning. Reed warblers emerge in bursts at dawn. By learning their habits—where birds perch, when they feed, how they call to each other—photographers can predict the best times and places for a shot.
Field note: A patient observer with a mid-range zoom will often snag a more compelling frame than someone who chases anything with wings. It’s all about waiting, not rushing.
Pick the Right Gear
You don’t always need the fanciest camera body, but certain features seriously help. Fast auto focus, high frames per second (at least 10 FPS), and decent low-light handling make tracking and capturing birds more doable. A 400mm lens (or zoom up to 600mm) is a strong pick for small, distant birds. For most, a sturdy tripod and a basic beanbag steady the shot. If the budget is tight, a used DSLR kit and patience beat gear envy every time.
Extra thought: Manual mode gives full control, but for quick-moving birds, aperture or shutter priority lets the camera solve half the puzzle. Don’t forget to shoot in RAW—you never know what you’ll want to adjust later.
Master Your Settings
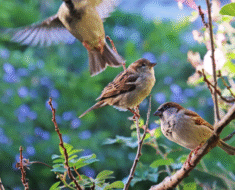
For perched birds, try setting the shutter speed at 1/1000s. For those sudden take-offs or in-flight dramas, kick it up to 1/2500s or higher. A wide aperture (like f/4–f/6.3) makes birds pop by blurring a cluttered background. If you’re dealing with low light, bump up the ISO but keep an eye on noise—sometimes grain adds character, sometimes it’s just distracting.
A trick for fast action: Customizing camera buttons (like for ISO or focus mode) can really shave precious seconds when a bird finally shifts or flies.
The Light Makes or Breaks the Shot
The best moments for bird photography come at sunrise or sunset—golden hours when the world glows softly and birds bustle with energy. Midday light can be harsh, so use it only if you want sharp contrast and stronger shadows. Angle yourself so the sun’s behind or beside you, lighting up plumage and revealing eye-catching details. For rainy or overcast days, rich colors sometimes stand out even more against a moody sky.
Focus on the Eyes
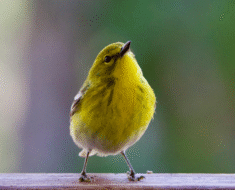
If only one thing’s tack sharp, let it be the bird’s eye. Eyes that catch the light (with a crisp ‘catchlight’ dot) make birds look alive and expressive. Even if every feather’s not perfect, a bright, in-focus eye will draw viewers in and elevate the photograph. Lower the camera, aim for eye-level, and click when those peepers glint just right.
Patience, Etiquette, and the Ethical Lens
Wild birds are skittish—barreling toward them rarely works. Move slowly, silence phones and chatter, and always give wildlife space. Avoid disturbing nests, keep a respectful distance, and never bait or stress birds just for a photo. A long lens lets you stay hidden, while a good hide or your own car is often the best blind. Remember, the best photos come naturally, not from posed or frightened subjects.
For more on supporting birds beyond the lens, check the Sparrow Conservation Guide: How to Help Local Populations Thrive and learn to balance creativity with care.
Composition and the Creative Angle
Use background and habitat in the frame—birds surrounded by branches, reeds, or sky tell a story. The rule of thirds adds balance: set the bird off-center, creating space for movement. Try shooting from low angles for intimate, immersive views; experiment with back light or silhouettes for something dramatic. A little trial and error, honest curiosity, and not taking things too seriously—that’s a recipe for stunning images.
Conclusion
Every wild bird photograph is part skill, part patience, and part sheer luck. This wild bird guide doesn’t promise magic, but it opens doors to sharper, more joyful images, new habits of respectful observation, and a genuine sense of connection. If a few shots flop, that’s fine—wildlife photography rewards those who keep trying, learning, and looking again tomorrow. Sometimes, the best moments really do show up when least expected. Birds—and good bird photos—will surprise, inspire, and keep even seasoned nature lovers coming back for one more sunrise.